Tomatoes are one of the most satisfying—and delicious—plants to grow at home. Whether you crave fresh slices for salads, homemade sauces, or cherry tomatoes to snack on, nothing beats the taste of vine-ripened fruit grown with your own hands. And the best part? You don’t need a backyard to do it.
With the right techniques, you can grow healthy, productive tomato plants in pots on a balcony, terrace, patio, or even a sunny windowsill. In this complete guide, you’ll learn how to grow tomatoes in containers from start to harvest, including choosing the best varieties, pots, soil, care routines, and common troubleshooting tips.
Why Grow Tomatoes in Pots?
Container gardening is perfect for urban gardeners, renters, and anyone with limited space. Tomatoes thrive in pots as long as you provide what they need.
Benefits of growing tomatoes in pots:
- You can move pots to follow the sun
- Avoids poor or contaminated soil
- Easier to control watering and feeding
- Prevents many soil-borne diseases
- Ideal for balconies, patios, rooftops, or small yards
Even better, tomatoes in containers are often more productive per square meter than those planted in the ground when cared for correctly.
Step 1: Choose the Right Tomato Variety for Containers
Not all tomatoes are suitable for container growing. For best results, choose compact, high-yield varieties.
Best tomato types for pots:
Determinate (bush) varieties:
- Grow to a fixed height and set fruit all at once
- Great for small spaces and beginner growers
- Need less staking
Examples:
- ‘Bush Early Girl’
- ‘Patio Princess’
- ‘Tiny Tim’
- ‘Roma’
Indeterminate (vining) varieties:
- Keep growing and producing throughout the season
- Need large pots and sturdy support
- Higher yield potential
Examples:
- ‘Sungold’
- ‘Sweet 100’
- ‘Cherokee Purple’
- ‘Brandywine’
Tip: Cherry tomatoes tend to do especially well in containers.
Step 2: Select the Best Pot Size and Material
Tomatoes have deep root systems, so a large, well-draining pot is essential for strong growth and good yields.
Minimum pot sizes:
- 5-gallon (20 liters) per plant for determinate types
- 10–15 gallons (40–60 liters) per plant for indeterminate types
Best pot materials:
- Plastic: Lightweight and holds moisture longer
- Terracotta: Attractive but dries out quickly (not ideal in hot areas)
- Fabric grow bags: Great airflow and drainage; easy to move
- Self-watering containers: Excellent for busy gardeners
Make sure your pot has multiple drainage holes to prevent root rot.
Step 3: Use High-Quality Potting Mix
Soil is one of the most important factors in container gardening. Avoid using garden soil—it’s too dense and may carry diseases.
Ideal potting mix for tomatoes:
- Lightweight and well-draining
- Rich in organic matter and nutrients
- Contains perlite or vermiculite for aeration
Optional additives:
- Compost or worm castings (for slow-release nutrients)
- Crushed eggshells (for calcium to prevent blossom end rot)
- Slow-release organic fertilizer pellets
Fill your container almost to the top, leaving a few centimeters for watering space.
Step 4: Planting Your Tomato Seedlings
Whether you start from seed or buy nursery seedlings, here’s how to plant them in containers:
Steps:
- Dig a deep hole—bury 2/3 of the stem to encourage strong root growth.
- Pinch off lower leaves before planting.
- Water thoroughly after planting.
- Place in a sunny location (6–8 hours of full sun daily).
If you’re starting from seed, sow indoors 6–8 weeks before your last frost date, then harden off before transplanting outside.
Step 5: Provide Proper Support
Even compact tomato plants benefit from support to stay upright and keep fruit off the soil.
Options:
- Tomato cages: Ideal for determinate varieties
- Stakes and twine: Best for indeterminate types
- Trellises: Space-saving and decorative
Install support at the time of planting to avoid disturbing roots later.
Step 6: Watering Your Potted Tomatoes
Tomatoes in pots dry out faster than those in the ground. Consistent watering is critical for healthy plants and preventing problems like cracking or blossom end rot.
Watering tips:
- Water deeply until water drains from the bottom
- Let the top inch of soil dry before watering again
- Morning watering is best to avoid mildew
- Use mulch (like straw or shredded leaves) to retain moisture
In hot weather, daily watering may be needed. Self-watering containers help maintain consistency.
Step 7: Feeding for Optimal Growth and Fruit Production
Tomatoes are heavy feeders. In containers, nutrients are used up quickly or washed away by watering, so regular feeding is essential.
Fertilizing schedule:
- Mix slow-release fertilizer into the soil at planting
- After flowering starts, feed every 1–2 weeks with a liquid fertilizer high in phosphorus and potassium
- Avoid excess nitrogen—it causes lush leaves but few fruits
Organic options include fish emulsion, compost tea, or seaweed extract.
Step 8: Pruning and Maintenance
Tomatoes benefit from some light pruning, especially indeterminate types.
Tips:
- Remove suckers (the shoots between the main stem and branches) to encourage better airflow and fruit development
- Prune yellow or damaged leaves
- Keep the base of the plant tidy to reduce disease risk
Also monitor for pests like aphids, whiteflies, and tomato hornworms. Neem oil or insecticidal soap can help.
Step 9: Pollination Tips for Indoor or Urban Balconies
Outdoors, bees and wind help with pollination. On balconies or indoors, you may need to assist.
How to hand-pollinate:
- Gently shake the plant to move pollen
- Use a small paintbrush or cotton swab to transfer pollen between flowers
- Do this in the morning when flowers are open
Good pollination = better fruit set!
Step 10: Harvesting Your Tomatoes
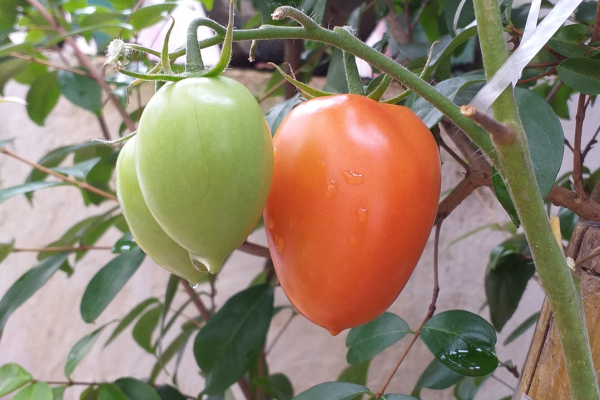
Tomatoes are ready to harvest when:
- They are fully colored (red, yellow, orange—depending on variety)
- Slightly firm but give slightly when pressed
- Come off the vine with a gentle tug
Don’t refrigerate freshly picked tomatoes—this dulls their flavor. Instead, store at room temperature and enjoy within a few days.
Tip: For continuous harvest, plant new seedlings every 3–4 weeks during the growing season.
Common Problems and How to Solve Them
Blossom end rot
Cause: Calcium deficiency or inconsistent watering
Solution: Water consistently, add calcium-rich amendments
Yellowing leaves
Cause: Nutrient imbalance or overwatering
Solution: Adjust feeding schedule and check drainage
Leaf spots or mold
Cause: Fungal diseases
Solution: Improve airflow, avoid overhead watering, use neem oil
No flowers or fruit
Cause: Too much nitrogen or low light
Solution: Use bloom-boosting fertilizer and ensure 6–8 hours of sun
Final Thoughts: Grow Big Flavor in Small Spaces
Growing tomatoes in pots is a satisfying way to enjoy the taste of fresh, homegrown produce—no backyard required. With the right pot, soil, light, and care, you’ll be rewarded with juicy, flavorful fruits all summer long.
Whether you’re on a balcony in the city or just want to keep things simple, potted tomatoes give you a flexible, productive, and rewarding gardening experience. So pick your favorite variety, grab a pot, and get growing!