Whether you’re gardening in a small backyard, on poor soil, or just want more control over your growing environment, raised garden beds are a simple and effective solution. They offer better drainage, easier access, and longer growing seasons—plus they look great in any outdoor space.
You don’t need to be a carpenter or have advanced tools to build one. With a bit of planning and basic materials, you can build your own raised bed in an afternoon and start growing vegetables, herbs, flowers, or even small fruit bushes right away.
In this step-by-step guide, you’ll learn how to design, build, fill, and plant a raised garden bed—perfect for beginners, urban gardeners, or anyone who wants a more organized, productive garden space.
What Is a Raised Garden Bed?
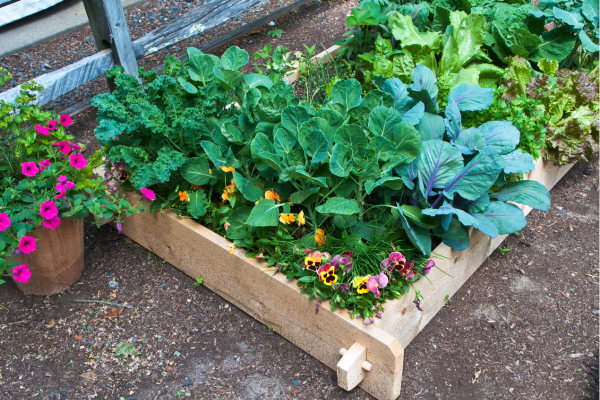
A raised garden bed is simply a contained planting area that sits above ground level. It’s typically framed with wood, metal, stone, or other materials and filled with soil and compost.
Benefits of raised beds:
- Better soil control: You choose what goes in it
- Improved drainage: Prevents waterlogging
- Less bending and kneeling: Easier on the body
- Fewer weeds: Especially when built on top of barriers
- Faster soil warming: Extends the growing season
- Cleaner appearance: Neat and organized garden layout
Step 1: Choose the Right Location
Before you build anything, identify the best spot in your yard or space.
Key considerations:
- Sunlight: Most vegetables need at least 6–8 hours of full sun daily
- Accessibility: You’ll need easy access to water and tools
- Level ground: Flat areas are easier to work with
- Protection: Try to place beds away from strong winds or heavy foot traffic
Tip: Avoid placing beds directly under large trees—roots will compete for water and nutrients.
Step 2: Select the Size and Shape
Start with a manageable size, especially if this is your first time building a raised bed.
Ideal beginner size:
- 4 feet wide (so you can reach the center from either side)
- 6 to 8 feet long (customizable to your space)
- 10 to 24 inches tall (12 inches is common and sufficient for most plants)
Raised beds can be any shape—rectangular, square, L-shaped, or even circular—but keep it practical for planting and harvesting.
Step 3: Gather Your Materials and Tools
You don’t need fancy supplies to build a strong and lasting bed.
Materials:
- Wood: Cedar or redwood is naturally rot-resistant. Pine is more affordable but won’t last as long.
- Screws or galvanized nails (deck screws are ideal)
- Optional liner: Landscape fabric or cardboard (for weed control)
- Soil and compost to fill the bed
Basic tools:
- Drill or screwdriver
- Saw (hand saw or circular saw)
- Measuring tape
- Level
- Shovel or rake
- Safety gloves
Optional: Corner brackets for extra stability and a more polished look.
Step 4: Cut and Assemble the Frame
This is the main construction step—but don’t worry, it’s easier than you think.
Instructions:
- Measure and cut your boards to your chosen length and width.
- Assemble the rectangle by joining the boards at the corners.
- Place shorter boards inside longer ones for a clean corner.
- Use 3 screws per corner to secure the boards tightly.
- Check level and square before final tightening.
If using a corner bracket kit, follow the manufacturer’s instructions for installation.
Tip: Build the bed near its final location to avoid having to move it after assembly.
Step 5: Prepare the Ground
What you place under your raised bed depends on your goals and what lies underneath.
Options:
- Grass or soil: You can place the bed directly on the ground. Grass will die off, but it’s helpful to remove sod for a flatter base.
- Weed barrier: Line the bottom with cardboard, newspaper, or landscape fabric to prevent weeds.
- Hard surfaces: You can even place raised beds on patios—just ensure good drainage and use deeper beds for root space.
Use a level and fill in low spots with soil to make sure the bed sits evenly.
Step 6: Fill with Soil and Compost
The quality of what you put in your raised bed will determine how well your plants grow.
Best soil mix for raised beds:
- 60% topsoil
- 30% compost (homemade or store-bought)
- 10% perlite or coarse sand (for drainage)
Or use a pre-mixed raised bed blend from a garden center.
Soil depth:
- 6–12 inches is fine for herbs, lettuce, and flowers
- 12–18 inches for root vegetables like carrots and beets
- 18–24 inches for tomatoes and deep-rooted plants
Tip: Water thoroughly after filling to settle the soil before planting.
Step 7: Add Optional Features
Raised beds can be simple or sophisticated. Consider adding:
Helpful upgrades:
- Trellis or cages for climbing plants (peas, beans, cucumbers)
- Row covers for protection from pests and weather
- Irrigation: Soaker hoses or drip lines for efficient watering
- Mulch: Top with straw or bark to retain moisture and reduce weeds
- Cold frames or hoop houses to extend the season
If you want to grow year-round, especially in colder regions, these additions can make a big difference.
Step 8: Start Planting
Now the fun part—filling your new bed with plants! Decide if you’ll grow from seed or seedlings, and create a plan.
Planting tips:
- Use a plant spacing chart to avoid overcrowding
- Group plants by needs (sun, water, nutrients)
- Rotate crops each season to prevent disease
- Combine companion plants like basil with tomatoes, or marigolds with vegetables to deter pests
Make pathways between beds wide enough to access all sides—about 18 to 24 inches minimum.
Step 9: Maintain and Monitor
A raised bed still needs care, but it’s often easier to maintain than an in-ground garden.
Regular maintenance:
- Water consistently (especially in hot weather)
- Check for pests or disease
- Fertilize with compost tea or organic blends as needed
- Replenish compost each season to maintain soil fertility
Each year, inspect the wood or materials for wear and reinforce if necessary.
Bonus: Raised Beds for Small Spaces and Balconies
Even without a backyard, raised beds are still an option. On a balcony or patio, you can:
- Use portable raised planters on wheels
- Install elevated beds on stands
- Try fabric grow bags or vertical stacking beds
Just ensure drainage, sunlight, and weight limits are considered.
Final Thoughts: Grow More, Worry Less
Building a raised garden bed is one of the smartest ways to make gardening easier, more efficient, and more productive—especially if you’re short on space or dealing with difficult soil.
With just a few materials and a free afternoon, you can create a garden that gives back season after season—whether you’re growing lettuce for your salads, basil for your pasta, or blooms for your soul.
So grab your tools, choose your spot, and start building. Your raised bed is the first step toward a thriving garden and a more connected life outdoors.