Raised garden beds are one of the best investments you can make as a gardener—especially if you’re working with poor soil, limited space, or accessibility challenges. Unlike in-ground gardening, raised beds give you control over soil quality, drainage, and layout. They also look neat and are easier to maintain. This in-depth guide provides everything you need to build, plant, and care for a raised garden bed—even if you’ve never used a hammer before.
1. Understanding the Benefits
1.1 Superior Soil Control
Gardeners get to fill raised beds with rich, nutrient-dense soil mixtures tailored to the plants they’re growing—free from weeds, rocks, or compaction.
1.2 Improved Drainage and Root Health
Because raised beds are elevated above ground level, excess water drains away quickly—reducing root rot, mold, and puddles.
1.3 Easy Weed Management
A raised structure makes it easier to monitor and remove weeds before they become a problem.
1.4 Accessibility
With heights between 12 and 36 inches, raised beds reduce back pain by limiting bending and kneeling—making gardening more accessible.
1.5 Extended Growing Season
Soil in raised beds warms faster in spring and retains heat into fall, extending your productive period.
2. Planning Your Raised Bed
2.1 Site Selection
- Sunlight: Select a location that receives at least 6–8 hours of direct sunlight daily.
- Water Source: Keep beds close to water access to minimize effort.
- Airflow: Space beds to allow air circulation and prevent fungal buildup.
2.2 Optimal Dimensions
A width of 3–4 feet is ideal for reaching the center from either side. Length is flexible—common sizes range from 6 to 12 feet, depending on yard space and accessibility. A depth of at least 12 inches is necessary, with 18–24 inches ideal for root crops.
2.3 Accessible Layout
Plan pathways of at least 18 inches wide for ease of movement. Avoid overshadowing and ensure easy access to all parts of each bed.
3. Choosing Materials and Tools
3.1 Wood Options
- Cedar or redwood: naturally rot-resistant, ideal longevity.
- Untreated pine: cost-effective but less durable.
- Reclaimed wood: eco-friendly, but may require treatment to remove contaminants.
- Composite or recycled plastic: non-rotting, but can heat up under intense sun.
3.2 Non-Wood Alternatives
- Stone or brick: durable and stylish but heavy.
- Corrugated steel: modern look, fast assembly, good durability.
- Concrete blocks: easy to stack and fill, durable but large and heavy.
3.3 Essential Tools
- Measuring tape, level, saw (hand or power), drill or screwdriver with exterior screws.
- Shovel for soil and planting, safety gloves, and dust protection when cutting wood.
4. Building the Bed Step-by-Step
4.1 Site Work
- Clear the ground of grass and weeds.
- Level the soil where the bed will sit.
- Consider using landscaping fabric if invasive weeds are a concern.
4.2 Constructing the Frame
- Cut boards to size and arrange into a rectangle; drill pilot holes to prevent splitting.
- Fasten corners with screws into 4×4 posts to ensure structural strength.
- Use a level during assembly to keep sides straight and true.
4.3 Strengthening the Structure
- For beds longer than 8 feet, add center braces to prevent bowing.
- Anchoring into the ground with rebar through corner posts increases stability—particularly in windy locations.
5. Filling with Ideal Soil Mix
5.1 Layering Guide
- A bottom layer of cardboard, sticks, or compostable material breaks up compaction.
- Middle layers of nutrient-rich topsoil and compost create structure.
- A final top layer mixes potting soil, compost, and perlite/coir for optimal drainage and fertility.
5.2 Soil Volume Calculation
An 8 ft × 4 ft × 0.5 ft bed holds ~16 cubic feet (~0.45 cubic meters). Ensure you have high-quality ingredients or purchase a ready-made organic soil blend.
6. Integrating Irrigation & Mulching
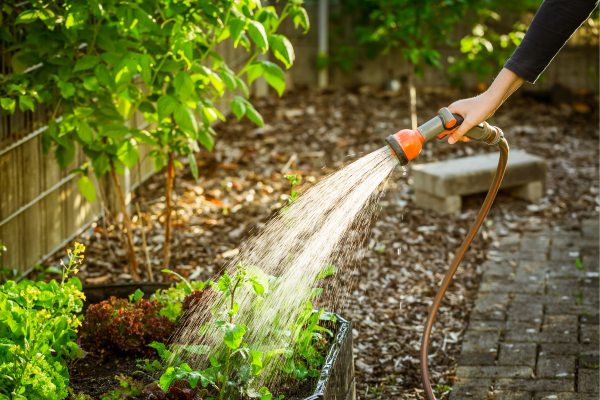
6.1 Water Delivery Systems
- Soaker hoses and drip irrigation deliver consistent moisture directly to plant roots with minimal waste. Timer systems automate watering and reduce manual work.
6.2 Mulching
Apply 2-3 inches of straw, wood chips, or shredded leaves to conserve moisture, suppress weeds, and regulate soil temperature.
7. Choosing What to Plant
7.1 Greens & Herbs
Leafy vegetables like lettuce, kale, and spinach thrive in shallow beds. Companion herbs like basil, cilantro, and parsley can serve multiple purposes and fit well between veggies.
7.2 Fruiting Crops
Tomatoes, peppers, dwarf eggplant, and cucumbers grow well in cages or trellised within raised beds, provided you have enough sunlight.
7.3 Root Crops
Carrots, beets, and radishes require at least 12 inches of soil depth to develop properly.
7.4 Flowers & Pollinator Plants
Add marigolds, nasturtiums, cosmos, and borage to attract beneficial insects and enhance biodiversity.
8. Planting Strategy
- Seed sowing: follow packet spacing, thin seedlings once they develop true leaves.
- Transplants: Plant at the greenhouse soil level; firm gently and water well.
- Companions: Pair tomatoes with basil or marigolds; interplant radish with lettuce for better space utilization.
Label plants clearly with bamboo stakes or garden tags.
9. Caring for Your Raised Bed
9.1 Regular Watering
Ensure the soil remains moist but not saturated—about one inch per week typically, adjusted for weather conditions.
9.2 Feeding
Apply compost tea, fish emulsion, or natural plant food monthly. Consider adding bone meal or kelp for flowering and fruiting crops.
9.3 Weeding & Mulch Maintenance
Remove weeds early and refresh mulch annually for consistent soil protection and cleanliness.
9.4 Staking & Support
Install tomato cages, bamboo stakes, and trellises as needed—for tomatoes, beans, or flowers like cosmos.
10. Pest, Disease, & Troubleshooting
10.1 Pest Control
- Use row covers or floating fabric to exclude pests early in the season.
- Hand-pick slugs, caterpillars, and beetles; treat insect outbreaks with neem, soap spray, or Bacillus thuringiensis for caterpillars.
10.2 Disease Prevention
- Avoid overhead watering to reduce fungal risk.
- Practice crop rotation to prevent soil-borne diseases.
- Store tools clean and use certified clean seed stock.
10.3 Soil Problems
- Add compost every season to fix compacted or depleted soil.
- Mulch conserves moisture and helps keep weed pressure manageable.
11. Seasonal and End-of-Life Care
11.1 Fall & Winter Prep
Remove spent plants and add compost or leaf mulch to overwinter beds.
Consider planting cover crops like clover or rye to improve soil structure and prevent erosion.
11.2 Spring Prep
Top up soil if it has settled.
Rotate crop families and plan your layout based on past performance.
12. Advanced Techniques & Scaling Up
- Double-decker beds: incorporate shallow areas above deeper ones for greens and root crops.
- Cold frames and cloches: enable early spring planting and season extension.
- Vertical extensions: Add a trellis to your bed to grow climbing beans or vining tomatoes.
Conclusion
Building and maintaining a raised garden bed is highly rewarding, giving you control, better yields, and a more accessible gardening experience. With careful planning, quality materials, and sensible care, your raised bed will provide vegetables, herbs, and flowers all season long—and can be expanded over time.
Whether you’re growing your first salad greens or starting a full edible garden, this foundation empowers you to grow with confidence and enjoyment.