For those with limited space—or anyone looking to add a touch of green style to their home—vertical gardening offers the perfect solution. Whether you live in a compact apartment, a house with a small yard, or simply want to make use of a bare wall, a vertical garden allows you to grow herbs, vegetables, or ornamental plants in an efficient, visually stunning way.
This complete step-by-step guide will walk you through the process of planning, building, and maintaining your own vertical garden—even if you’ve never gardened before. Let’s turn your walls, fences, or balconies into lush, living displays.
Why Vertical Gardens Are Worth It
Before diving into how to make one, it’s important to understand why vertical gardens are so valuable:
- Space-saving: Ideal for small apartments, patios, or balconies.
- Improved aesthetics: Transforms dull walls into vibrant, green areas.
- Better air quality: Plants filter toxins and provide cleaner indoor air.
- Accessibility: Easier to maintain for people with limited mobility.
- Productivity: Allows you to grow more in less ground space.
- Flexibility: Can be indoors or outdoors, fixed or movable.
Vertical gardens are practical, functional, and beautiful all at once.
Step 1: Choose the Best Location
A successful vertical garden starts with selecting the right spot. Your location determines what kind of plants you can grow and what structure to use.
Key Considerations:
- Sunlight: Does the area get full sun, partial sun, or mostly shade?
- Most herbs and vegetables require 6–8 hours of sunlight daily.
- Ferns and low-light plants work better in shaded spots.
- Accessibility: Choose a spot that you can reach easily for watering, pruning, and harvesting.
- Water exposure: If outdoors, consider whether the wall gets rained on directly. If indoors, make sure water won’t damage surfaces.
- Weight support: Make sure the wall or structure can support the weight of wet soil, containers, and growing plants.
Popular locations include:
- Balcony walls or railings
- Kitchen walls (for herb gardens)
- Fences
- Bathroom walls (for humidity-loving plants)
- Living room decor zones
Step 2: Decide What to Grow
Your plant choices should match your space, light, and goals. Do you want beauty, food, or both?
Great Options for Vertical Gardening:
🌿 Herbs:
- Basil
- Thyme
- Mint
- Parsley
- Chives
- Oregano
🥬 Leafy Greens:
- Lettuce
- Spinach
- Arugula
- Kale
🌸 Ornamentals:
- Ferns
- Pothos
- Spider plant
- English ivy
- Peace lily
🌼 Flowers:
- Petunias
- Begonias
- Marigolds
- Nasturtiums
🍓 Edibles:
- Strawberries
- Cherry tomatoes (dwarf varieties)
- Peppers (small varieties)
Choose plants that share similar light and water needs if they’re going to be grown close together.
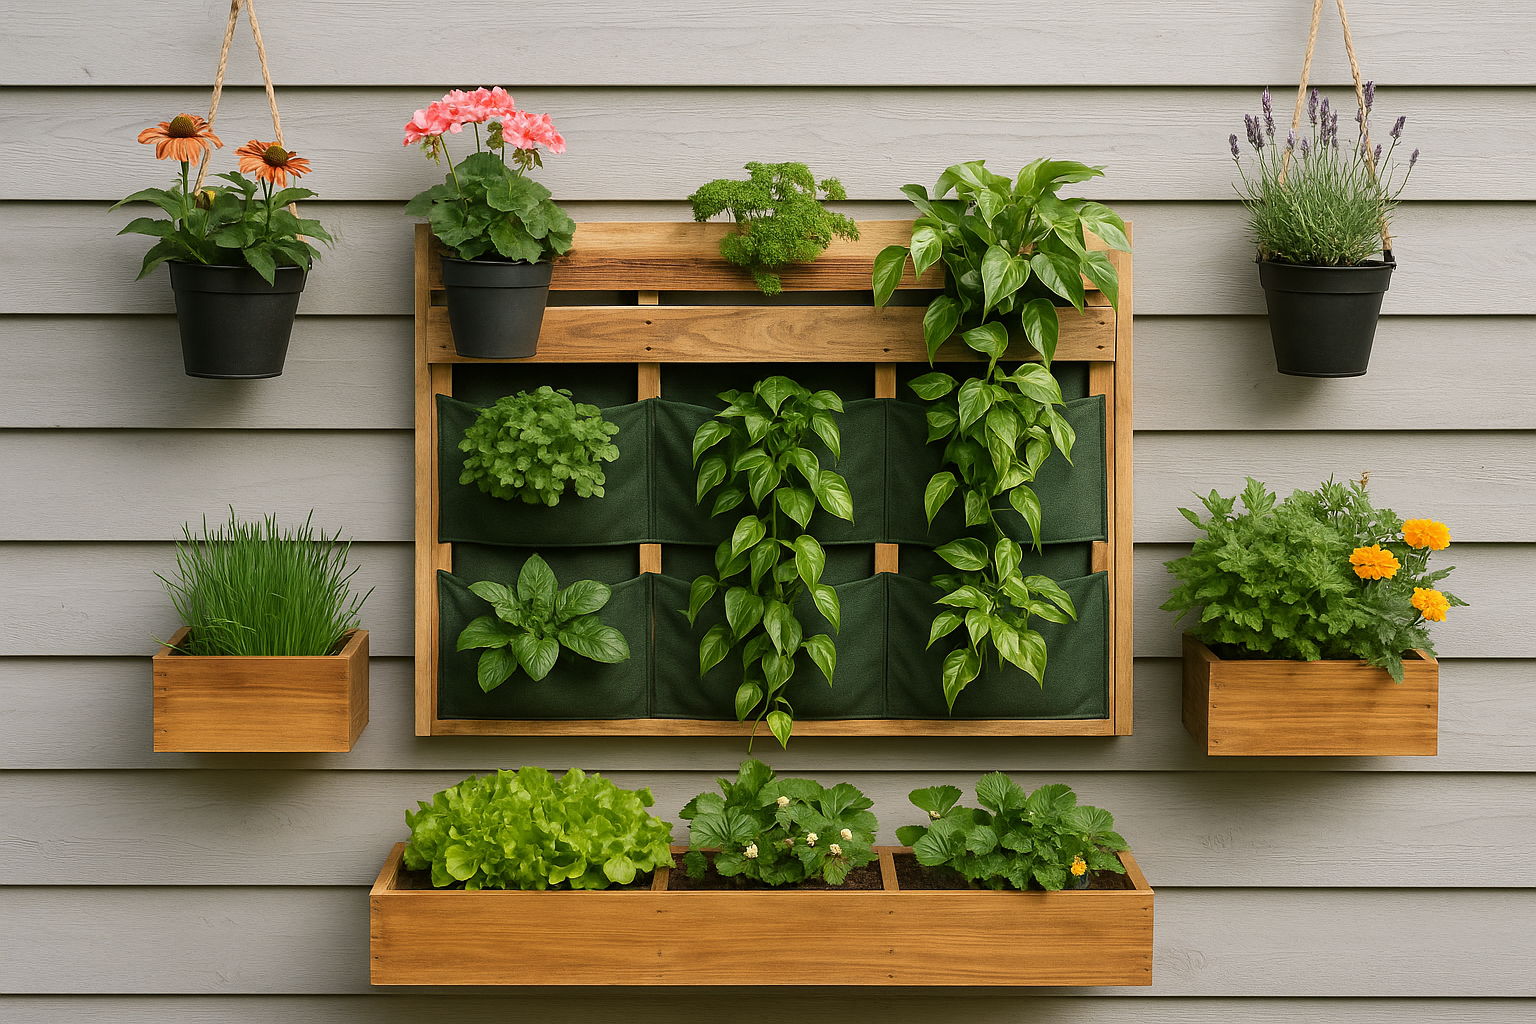
Step 3: Choose Your Vertical Garden Structure
Vertical gardens come in many forms, from ready-made kits to DIY designs. You’ll want to choose a setup that fits your space, budget, and aesthetic preferences.
Popular Structure Ideas:
- Hanging Planters
- Use individual pots hung vertically with rope or mounted shelves.
- Best for herbs and lightweight plants.
- Pallet Garden
- Recycle a wooden pallet, add landscape fabric and fill it with soil.
- Great for leafy greens and flowers.
- Pocket Planters
- Felt or fabric wall organizers with planting pockets.
- Excellent for herbs and small vegetables.
- Stacked Pots
- Stack containers or use tiered shelving.
- Flexible and easy to move.
- Gutter Garden
- Repurpose rain gutters horizontally on a wall.
- Ideal for lettuces and shallow-rooted plants.
- Modular Living Wall Systems
- Available as kits with built-in irrigation.
- More expensive but great for large, aesthetic projects.
- Trellis or Wire Grid
- Combine climbing plants with a wire support system.
- Best for ivy, tomatoes, or beans.
Make sure your structure allows for proper drainage, stability, and access to water.
Step 4: Gather the Materials and Tools
Once your design is planned, gather the necessary items. A typical vertical garden requires:
- Pots or containers
- Potting mix suitable for your plant types
- Fertilizer (organic or slow-release)
- Watering can or spray bottle
- Support structure (wood, wire, pallet, etc.)
- Screws, nails, or mounting materials
- Landscape fabric (if needed for DIY planters)
- Tools: drill, hammer, measuring tape, level
Optional: self-watering system, moisture meters, or grow lights for indoor gardens.
Step 5: Assemble the Structure
If you’re using a store-bought vertical garden system, follow the manufacturer’s instructions. For DIY projects, here’s a general process:
DIY Wall Pocket Garden Example:
- Attach a wooden or metal frame to the wall securely.
- Hang felt fabric or canvas planter pockets.
- Fill pockets with potting mix.
- Insert your chosen plants.
- Water thoroughly.
Always test the structure’s sturdiness before planting. The setup should hold weight and resist tipping.
Step 6: Prepare the Soil and Plant
The quality of your soil is critical, especially since vertical gardens often dry out more quickly than traditional beds.
Soil Tips:
- Use light, well-draining potting mix with organic matter.
- Add perlite or vermiculite to improve air flow and drainage.
- Mix in slow-release fertilizer to feed plants gradually.
Planting Process:
- Place taller or cascading plants at the top.
- Reserve lower areas for plants that need more shade or moisture.
- Avoid overcrowding—leave space for growth and airflow.
- Press soil gently around roots for stability.
Water thoroughly after planting and allow the garden to settle.
Step 7: Water and Feed Regularly
Vertical gardens need frequent watering, especially in sunny or windy locations. Since water drains downward, plants at the top may dry out faster than those below.
Watering Guidelines:
- Check soil moisture daily.
- Use a watering wand, drip system, or watering can with a long spout.
- Water in the early morning or late afternoon.
- For indoor gardens, avoid overwatering to prevent mold or wall damage.
Fertilizing:
- Apply liquid fertilizer every 2–4 weeks during growing seasons.
- Organic options: compost tea, seaweed extract, worm castings.
Consider a self-watering reservoir or automated irrigation system for larger gardens.
Step 8: Maintain and Monitor
A vertical garden, like any garden, needs regular care to stay beautiful and productive.
Maintenance Checklist:
- Remove dead or yellowing leaves
- Prune back overgrown plants to encourage new growth
- Check for pests (aphids, spider mites) and treat naturally if needed
- Clean containers and structure periodically to prevent mold buildup
- Rotate crops occasionally to renew soil and avoid nutrient depletion
Keep a garden journal or use an app to track planting dates, watering, fertilizing, and observations.
Creative Design Ideas for Vertical Gardens
Want your garden to make a visual impact? Here are a few ideas:
- Color blocking: Use plants with different leaf or flower colors in patterns.
- Kitchen herb wall: Hang labeled pots of herbs near your cooking area.
- Living art frame: Use a shallow box to create a green “painting” with succulents.
- Fragrant wall: Include aromatic plants like lavender, rosemary, or jasmine.
- Edible wall: Grow strawberries, lettuce, and cherry tomatoes together.
With a little creativity, your vertical garden becomes a decorative feature as much as a productive one.
Transform Your Space—One Wall at a Time
Vertical gardening is proof that limited space doesn’t have to limit your green thumb. Whether you’re growing herbs for your kitchen, leafy greens for your meals, or flowers for pure joy, vertical gardens provide beauty, productivity, and peace—all in a compact format.
You don’t need a big backyard or years of experience. All it takes is thoughtful planning, the right setup, and a little daily care. In return, you’ll gain a healthier environment, a deeper connection with nature, and a space you’ll love even more.