Garlic (Allium sativum) is surprisingly easy to grow at home. With a small investment in planting cloves in fall or early spring, even balcony or container gardeners can harvest fresh, flavorful bulbs by summer. This full-scale guide covers everything: from choosing varieties to planting, growing, curing, and storing garlic—plus container alternatives, pest control, and usage ideas. Let’s get started.
1. Why Grow Garlic at Home?
- Homegrown flavor: Garlic you grow yourself tastes sweeter and sharper than store-bought, and avoids pre-harvest sprouting.
- Easy to grow: Garlic requires minimal maintenance once planted.
- Space-efficient: Even pots or small raised beds work.
- Health benefits: A strong source of antioxidants, vitamin C, and flavor.
- Longevity: Properly cured bulbs keep for 6–8 months.
Homegrown garlic makes a lovely addition to any kitchen garden, even with limited space or beginner experience.
2. Selecting Garlic Varieties
Garlic is categorized into two main types:
Softneck Garlic (Allium sativum var. sativum)
- Best for mild climates; stores longer (up to 9 months).
- Examples: ‘California Early’, ‘Inchelium Red’, ‘Germidour’.
- Ideal for indoors or container growing; easy to braid.
Hardneck Garlic (Allium sativum var. ophioscorodon)
- Needs cold winter for proper bulb formation (vernalization).
- Produces scapes (flower stalks) you can harvest as bonus crops.
- Varieties: ‘Rocambole’, ‘Porcelain’, ‘Purple Stripe’ (e.g. ‘Music’, ‘Chesnok Red’).
- Rich flavors and easy-to-peel cloves, but shorter storage life (4–6 months).
Choosing What to Grow:
- Containers/warmer climates: Choose softneck types for longer storage and better performance in mild zones.
- Cool climates & flavor-lovers: Go with hardneck heirlooms for complex flavor and scape harvests.
- Always use organic, local seed garlic (not grocery store bulbs treated for sprouting). Check varieties matched to your winter chill hours.
3. Planning Your Growing Environment
Planting Time:
- In most temperate zones, plant garlic in fall (4–6 weeks before first hard frost).
- For mild-winter areas, many growers plant in late fall or even winter.
- Hardneck types benefit most from cold exposure; softneck can be spring-planted in moderate climates.
Containers vs Ground Beds:
- Raised beds or traditional gardens: Ideal—nutrient-rich, well-drained soil.
- Containers and pots: 8–12″ deep and at least 10″ wide; space multiple cloves at 4–6″ apart in larger troughs or large pots.
Soil & Sun Requirements:
- Full sun: at least 6 hours daily.
- Well-draining soil: Garlic doesn’t tolerate waterlogged ground.
- Soil pH: Aim for 6.0–7.0; amend with lime if soil is acidic.
Fertility:
- Enrich planting area with compost or composted manure.
- Before planting, work in slow-release balanced fertilizer (e.g. 5–10–10).
- Avoid fresh manure or high-nitrogen materials that burn cloves or cause mold.
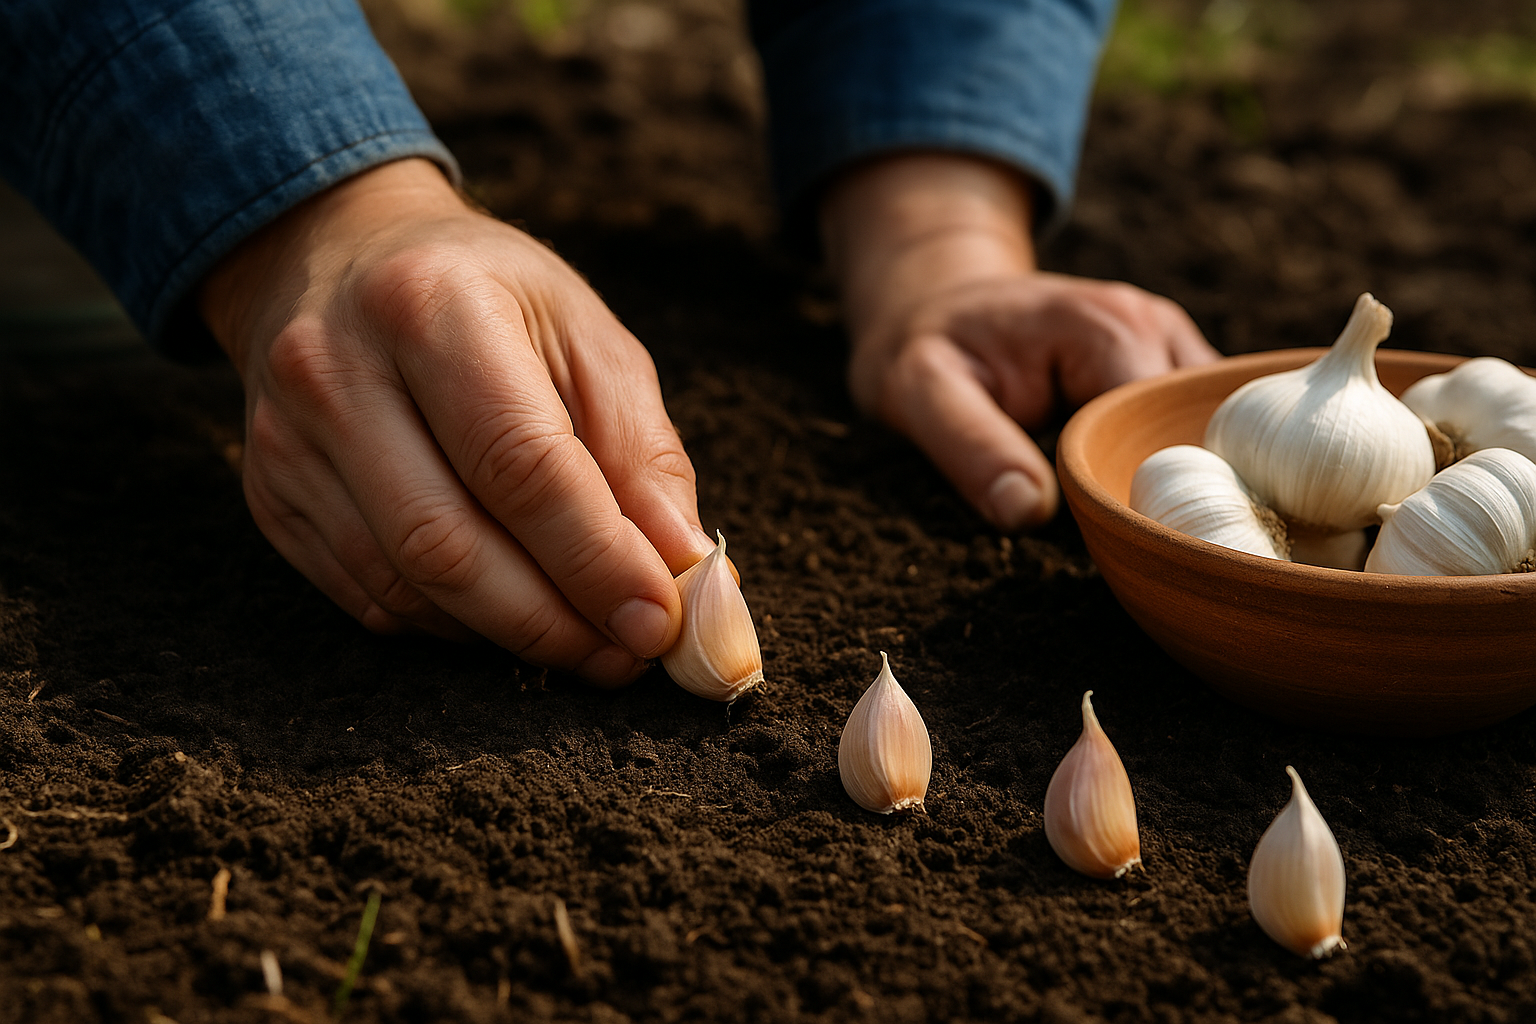
4. Preparing and Planting Garlic
- Break bulbs carefully into individual cloves, keeping papery skins intact.
- Choose only the largest, firm cloves for planting—save small cloves for cooking.
- Plant each clove pointy end up, 2 inches deep and 4–6 inches apart.
- For raised beds, rows should be 6–8 inches apart.
- Lightly cover with soil, press down gently so the clove has contact with soil.
- Water well immediately, then mulch with 2–3 inches of straw or compost to insulate over winter and suppress weeds.
In containers, plant in fall (or early spring in warmer areas), keep in an unheated but frost‑exposed area; move containers indoors if heavy freezes threaten.
5. Garlic Care Throughout Growth
Overwinter Care:
- In winter, low maintenance: your mulch layer protects cloves.
- If spring arrives with frost, mulch remains for temperature buffering.
Spring Growth:
- Scape emergence (in hardneck types): snap off these curly flower stalks to redirect energy into bulb formation—save them for cooking.
- Weed by hand to avoid disturbing shallow roots.
- Fertilize with compost tea or balanced organic feed when green shoots reach 6 inches.
- Water moderately; garlic prefers moist but not soggy conditions.
Mid-season:
- Remove mulch once soil warms and sprouting speeds up (February–April in many zones).
- Keep watering consistent: 1–1.5 inches per week, depending on climate.
- Watch for yellowing or soft leaves—indicates nearing harvest.
6. Harvesting and Curing Garlic
When to Harvest:
- Harvest when leaf tips turn yellow or brown, typically late spring to early summer.
- Avoid waiting too long: bulbs separate prematurely in the ground and storage life declines.
Harvesting Method:
- Gently loosen bulbs with a garden fork, pulling gently by leaves (avoid twisting).
- Brush off loose soil; avoid washing for longer storage.
Curing Process:
- Lay bulbs in a single layer or hang bunches in a dry, ventilated, shaded area (e.g., garage, shed) at 60–75°F.
- Cure for 2–3 weeks until outer skins feel papery and shrine-like.
- Trim roots and cut stems to 1–2 inches if softneck; leave stems longer for braiding if desired.
- Remove only outer papery layers. Inner skins must remain intact.
7. Storing and Using Garlic
Storage Conditions:
- Keep garlic in a dry, cool place (55–60°F) with good airflow (net bags, mesh baskets).
- Avoid refrigeration: too damp, and cloves sprout or rot.
Expected Shelf Life:
- Softneck types: up to 8–9 months if stored properly.
- Hardneck types: typically 4–6 months before quality declines.
Usage Ideas:
- Use fresh scapes in stir-fries and pesto.
- Store bulbs whole: peel cloves as needed.
- For long-term use: peel and freeze garlic in minced form or freeze cloves individually for cooking.
8. Pest, Disease & Troubleshooting
Garlic is generally pest-resistant but can face challenges:
Common Garlic Pests:
- Onion thrips: small insects that feed on leaves; use neem oil or insecticidal soap early in season.
- Nematodes: stunted growth; rotate crop location each year to prevent buildup.
Disease Issues:
- White rot (Sclerotium cepivorum): causes mushy bulbs; practice crop rotation and avoid planting raw onion/garlic in the same spot for 3+ years.
- Downy mildew & purple blotch: fungal spotting; ensure good airflow and avoid overhead watering.
- Fusarium basal rot: yellowing, soft neck bulbs; avoid planting in infected soil.
Best Practices for Prevention:
- Use disease-free planting stock.
- Rotate garlic planting zones every 2–3 years.
- Practice clean harvesting tools and gloves.
- Allow soil to rest with cover crops (legumes, clover) between garlic plantings.
9. Container Growing Tips
- Use 5–7 gallon planters or grow bags with deep, well-draining soil.
- Space cloves 4–6 inches apart in containers.
- Plant autumn cloves in containers set outdoors; ensure drainage and keep mulch during winter.
- If winters are extreme, move containers under a cold frame or sheltered area—but keep them exposed to some cold.
- Adjust watering seasonally; overwatering causes bulb rot.
- Harvest and cure bulbs the same as in-ground.
Container garlic is surprisingly generous—several bulbs per planter row.
10. Post-harvest Ideas & Culinary Uses
- Use garlic-infused olive oil with cured minced garlic—freeze cubes for cooking.
- Roast bulbs whole once cured for mellow, sweet garlic.
- Quick-pickle garlic cloves for tangy condiment.
- Save scapes: sauté in butter or make scape pesto.
Final Thoughts
Growing garlic at home is a gratifying and surprisingly simple project. With fall planting, mellow maintenance, and proper curing, you can enjoy flavorful bulbs harvested straight from your own soil. Whether you grow in garden beds or containers, the experience deepens your connection to cooking and growing. Pause, observe, and plan your garlic planting cycles—it’s a low-effort, high-reward crop that adds depth to both garden and kitchen.