Starting seeds indoors is one of the most empowering and rewarding ways to grow a garden. With just a few supplies and a bit of care, you can raise healthy, strong plants from seed—saving money, gaining control over your garden’s timeline, and enjoying the full cycle of plant life right from your windowsill or countertop.
Whether you want to grow vegetables, herbs, or flowers, this guide will walk you through everything you need to start seeds indoors successfully—from choosing the right seeds to transplanting your seedlings outdoors.
Let’s dig in and get growing!
Why Start Seeds Indoors?
While many gardeners rely on store-bought seedlings or direct sowing, starting your own seeds indoors has several distinct advantages:
- Longer growing season: Especially important in regions with short summers.
- Greater variety: You’re not limited to what your local nursery sells.
- Cost savings: A packet of seeds can grow dozens of plants.
- Healthier plants: You control the environment from the beginning.
- Satisfaction: Watching your plants grow from seed to harvest is incredibly fulfilling.
Plus, it gives you a head start when you’re eager to garden but the weather isn’t cooperating outside.
Step 1: Choose the Right Seeds
The first step is selecting what you want to grow. Look for plants that benefit most from early indoor starting.
Great candidates for indoor seed starting:
- Tomatoes
- Peppers
- Eggplants
- Broccoli and cauliflower
- Cabbage and kale
- Lettuce
- Herbs like basil, parsley, and thyme
- Annual flowers like zinnias, marigolds, and cosmos
Check the seed packet for information like:
- Days to germination
- Indoor sowing recommendations
- Transplant timing after frost
Avoid root vegetables (like carrots or beets), which do better when direct sown into the garden.
Step 2: Gather Your Supplies
You don’t need a lot of fancy equipment to get started. Here’s what you’ll need:
Essentials:
- Seed trays or containers (with drainage holes)
- Seed starting mix (lightweight, sterile, and well-draining)
- Labels or markers (to keep track of what’s planted where)
- Spray bottle or gentle watering can
- Plastic dome or clear cover (to retain moisture)
- Grow lights or a sunny windowsill
Optional but helpful:
- Heating mat (to help warm the soil for germination)
- Humidity dome
- Fan (to strengthen seedlings and prevent damping-off)
Tip: You can reuse yogurt cups, egg cartons, or toilet paper rolls—just make sure to add drainage holes.
Step 3: Prepare Your Containers and Soil
Before planting, it’s important to moisten your seed starting mix. This helps prevent displacing seeds when watering later.
Steps:
- Pour seed starting mix into a bowl or container.
- Add warm water and stir until the mix feels like a damp sponge.
- Fill your seed trays or pots almost to the top, gently pressing down without compacting.
Avoid using regular garden soil—it’s too dense and may contain pests or diseases.
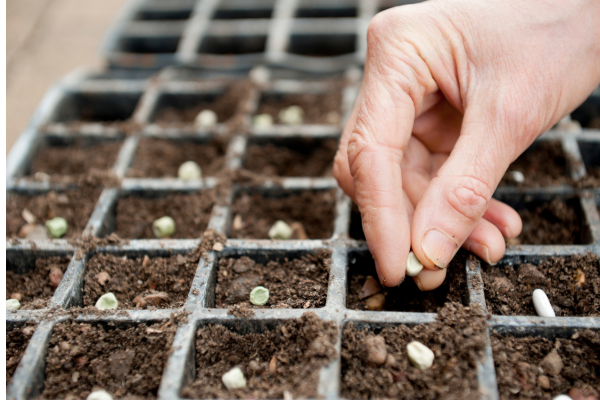
Step 4: Plant Your Seeds
Planting depth is crucial. Too deep, and seeds may not germinate; too shallow, and they may dry out.
How to plant:
- Read the seed packet for depth instructions (usually 1/8″ to 1/2″).
- Use a pencil, finger, or dowel to create holes at the correct depth.
- Drop in 1–2 seeds per cell or pot.
- Cover lightly with soil and gently pat down.
- Mist with water to settle the soil.
Label immediately—you’ll be surprised how hard it is to remember which tray holds what!
Step 5: Provide Heat and Humidity for Germination
Seeds need consistent warmth and moisture to sprout.
Ideal germination conditions:
- Temperature: 65°F to 75°F (18°C to 24°C)
- Humidity: High until germination, then reduce
Cover your trays with a plastic dome or clear plastic wrap to retain moisture. Place them in a warm area (on top of the fridge, near a radiator, or use a seedling heat mat).
Do not place in direct sunlight until after sprouting.
Step 6: Light Is Everything After Germination
As soon as seedlings emerge (usually within 5–14 days), they need lots of light to grow strong and healthy.
Options:
- Grow lights: Best option for consistent, full-spectrum light
- South-facing windows: Acceptable if very bright and sunny
Keep lights 2–3 inches above seedlings and adjust as they grow. Provide 12–16 hours of light per day for optimal growth.
Without enough light, seedlings become leggy and weak.
Step 7: Water with Care
Overwatering is a common cause of seedling failure.
Watering tips:
- Use a spray bottle or bottom-watering method to avoid disturbing roots
- Keep soil moist but not soggy
- Allow the surface to dry slightly between waterings
- Improve airflow to prevent mold and fungus
If using trays with drainage holes, place them in a waterproof tray and water from below.
Step 8: Thin Seedlings for Healthier Growth
If multiple seeds germinated in one cell, you’ll need to thin them to avoid overcrowding.
How to thin:
- Wait until seedlings have 1–2 sets of true leaves.
- Use scissors to snip weaker seedlings at the base, leaving the strongest one.
- Avoid pulling them out, which can damage roots.
While it feels wasteful, thinning is essential for strong, healthy plants.
Step 9: Fertilize Seedlings Lightly
After about 2–3 weeks, your seedlings will need a gentle boost.
Fertilizer tips:
- Use a diluted liquid fertilizer (¼ strength) every 1–2 weeks
- Choose organic or balanced formulas designed for seedlings
Too much fertilizer can burn tender roots, so always start weak and build up as needed.
Step 10: Harden Off Before Transplanting Outdoors
Your seedlings have been pampered indoors—protected from wind, temperature shifts, and full sun. Before transplanting, they need to acclimate gradually to outdoor conditions.
How to harden off:
- Start about 7–10 days before planting outdoors.
- Take seedlings outside for 1–2 hours per day, increasing time gradually.
- Begin in shade or dappled light, then introduce full sun.
- Bring indoors at night, especially if temperatures dip.
This process strengthens stems and reduces transplant shock.
Bonus Tips for Success
- Keep a garden journal to track germination times, growth, and observations.
- If your seedlings are leaning toward the light, rotate trays daily.
- Don’t rush transplanting—wait until all danger of frost has passed.
- Save extra seedlings to share with friends, family, or community gardens.
Final Thoughts: From Tiny Seeds to Thriving Gardens
Starting seeds indoors is more than just a gardening technique—it’s a deeply rewarding process that connects you to the rhythms of life. Watching a tiny seed transform into a strong, fruit-bearing plant is both magical and empowering.
With a bit of care, planning, and light, you can fill your garden with robust, healthy plants grown right from your windowsill. You’ll save money, grow rare or specialty varieties, and experience gardening from its very first moment.
So pick up some seed packets, gather your supplies, and begin your gardening journey today—one seed at a time.