As more people move into apartments and urban environments, gardening is becoming less about sprawling backyard beds and more about smart, space-saving solutions. That’s where vertical gardens come in—a brilliant way to grow herbs, flowers, and even vegetables without needing a traditional garden plot.
A vertical garden allows you to grow up instead of out, using walls, fences, trellises, or specially designed structures to create a lush, green space in even the tiniest areas. Whether you’re working with a balcony, a patio, or just a sunny kitchen wall, this guide will help you plan, build, and maintain your own vertical garden step by step.
Let’s dig in!
Why Choose a Vertical Garden?
Vertical gardening is about much more than just aesthetics (though they’re certainly beautiful). Here are some key benefits:
- Space efficiency: Ideal for apartments, balconies, and narrow yards
- Better air circulation: Reduces disease in crowded plants
- Improved access: Easier to harvest and maintain without bending
- Natural insulation: Helps regulate indoor and outdoor temperatures
- Pest control: Fewer soil-borne insects to deal with
- Increased yield: You can grow more in less space with smart stacking
Vertical gardens also offer a creative outlet. You can use everything from pallets and pocket planters to old shoe organizers and plastic bottles.
Step 1: Choose the Right Location
Your first decision is where your vertical garden will live. This depends on several factors:
Consider:
- Sunlight: Most plants need 6–8 hours of sun daily
- Wind exposure: Avoid areas with strong gusts that can damage vertical structures
- Accessibility: Can you easily water and maintain it?
- Surface strength: If mounting to a wall or fence, make sure it can support the weight
Good options include:
- Balcony railings
- Patio walls
- Kitchen or laundry room walls (with proper drainage)
- Fences
- Sides of sheds or garages
- Indoor windowsills (for herbs and houseplants)
Step 2: Select Your Vertical Garden Structure
There are endless ways to build a vertical garden. Here are a few common methods:
1. Wall Planters or Pocket Planters
- Fabric or felt hanging systems with multiple pockets
- Best for herbs, strawberries, and leafy greens
- Can be mounted indoors or out
2. Stacked Pots or Tiered Shelves
- Uses the vertical space by stacking containers in a pyramid or stair-step design
- Easy to rearrange and maintain
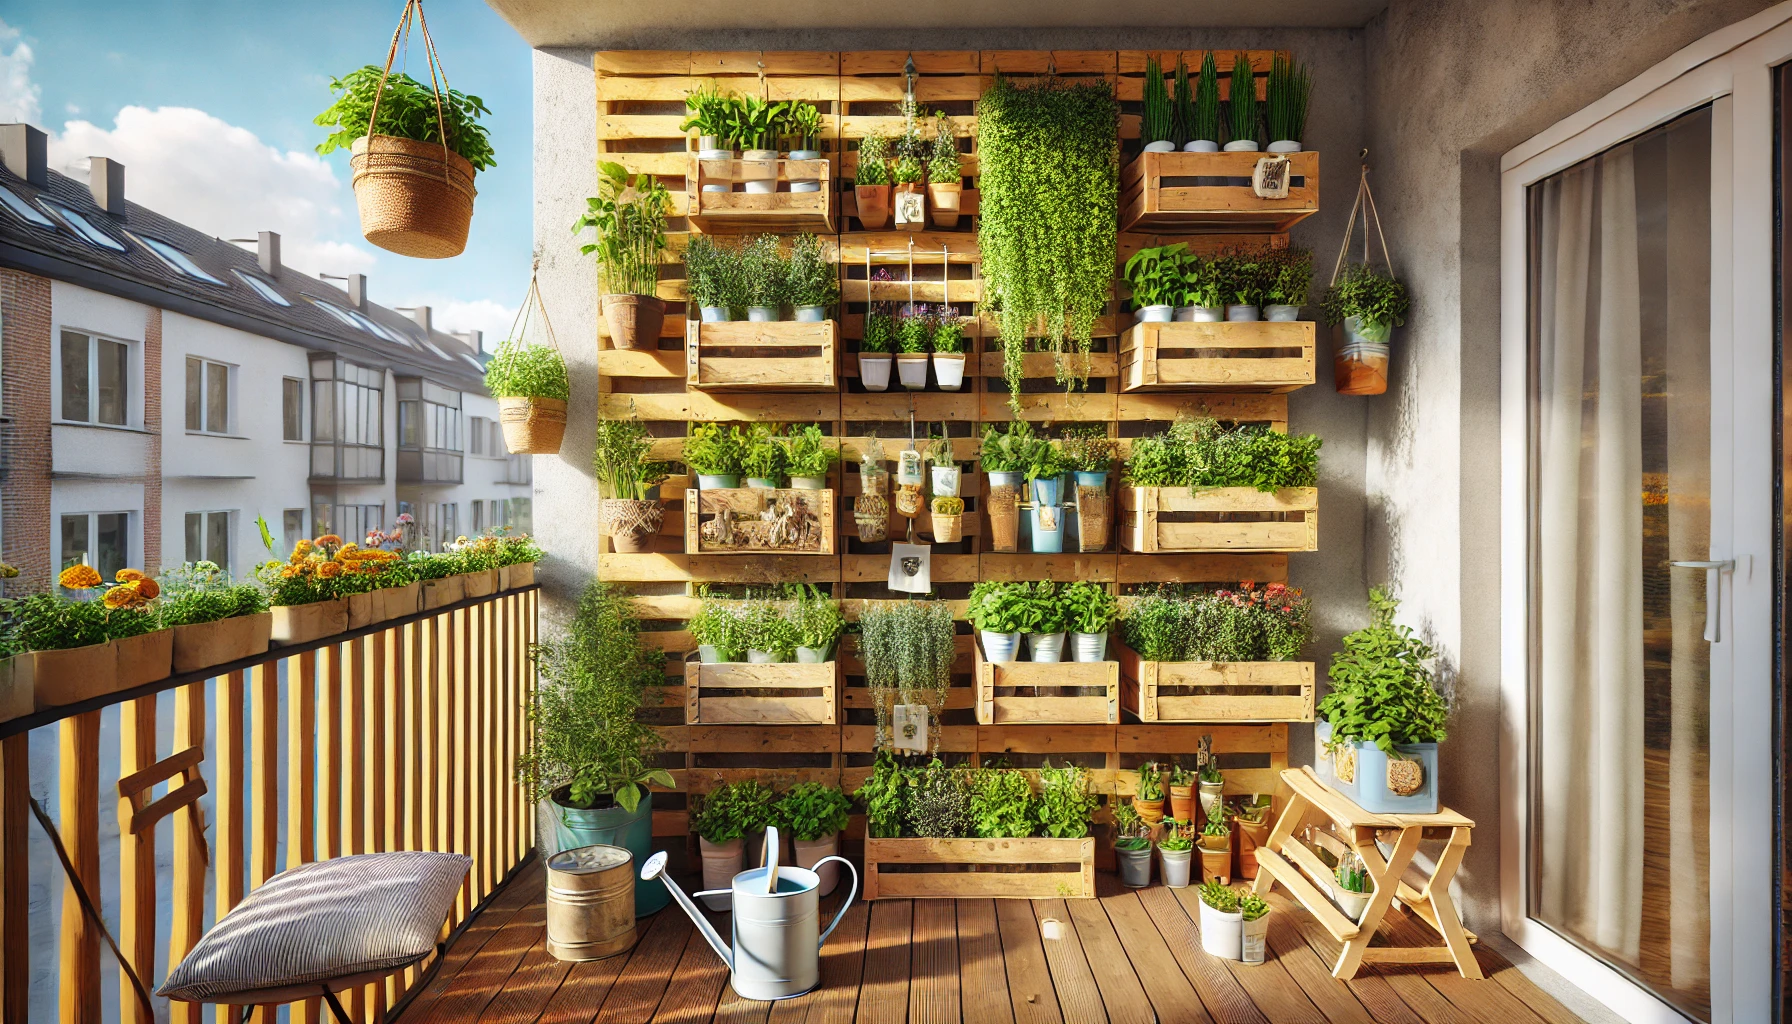
3. Pallet Gardens
- Old wooden pallets filled with soil and planted between slats
- Cheap, eco-friendly, and great for rustic aesthetics
4. Hanging Bottles or Recycled Containers
- Reuse soda bottles, coffee cans, or milk jugs
- Suspend from a rod or railing with strings or hooks
5. Trellises and Climbing Structures
- Perfect for vining plants like tomatoes, peas, beans, and cucumbers
- Requires strong support and regular training of vines
Choose a structure that fits your available space, skill level, and the types of plants you want to grow.
Step 3: Pick the Right Plants
Not every plant is ideal for vertical growing. You’ll want compact, shallow-rooted, and low-maintenance varieties—especially if you’re just starting out.
Great plants for vertical gardens:
Herbs:
- Basil
- Parsley
- Mint
- Thyme
- Oregano
- Chives
Leafy Greens:
- Lettuce
- Spinach
- Kale
- Arugula
- Swiss chard
Flowers:
- Petunias
- Marigolds
- Nasturtiums
- Pansies
- Begonias
Vegetables:
- Cherry tomatoes
- Peas
- Green beans
- Radishes
- Peppers
Indoor options (for indoor vertical gardens):
- Spider plant
- Pothos
- Ferns
- Peace lily
- Philodendron
Tip: Group plants with similar water and light needs together to make maintenance easier.
Step 4: Plan for Watering and Drainage
One of the biggest challenges with vertical gardens is keeping all the plants properly hydrated—especially those at the top and bottom.
Watering tips:
- Install a drip irrigation system or use self-watering containers
- Water from the top and allow gravity to help distribute moisture
- Use a spray bottle or watering wand for precision in tight areas
- Choose soil that retains moisture but drains well
- Add mulch or moss to reduce evaporation
Drainage is crucial to avoid mold, mildew, and root rot. If growing indoors, place trays or saucers to catch excess water.
Step 5: Assemble and Install Your Vertical Garden
Once you’ve chosen your location, structure, and plants, it’s time to bring it all together.
Basic steps:
- Mount or position your structure securely
- Add liners or fabric if needed to hold soil in pockets or containers
- Fill with quality potting mix (not garden soil—it’s too dense)
- Plant from the bottom up to avoid disturbing upper plants
- Water thoroughly after planting
- Label your plants so you remember what’s what
For outdoor systems, consider anchoring the base with bricks or weights to prevent tipping during storms or high winds.
Step 6: Maintain and Monitor Regularly
A vertical garden requires consistent care to stay lush and productive. Here’s how to keep it in top shape:
Weekly tasks:
- Water according to plant needs
- Prune overgrowth and dead leaves
- Check for pests like aphids or spider mites
- Rotate plants if they’re not getting even sunlight
- Refill soil as it settles or compresses
Seasonal maintenance:
- Refresh annuals and replant as needed
- Clean containers or fabric planters
- Add compost or organic fertilizer every few months
Bonus tip: Use a simple app or gardening journal to track what you’ve planted, harvest dates, and growth progress.
Step 7: Customize for Style and Function
One of the most enjoyable parts of vertical gardening is how customizable it is. Make it not just functional, but beautiful and uniquely yours.
Design ideas:
- Use matching pots or color-coded containers
- Paint your pallets or hang decorative labels
- Incorporate LED string lights for a nighttime glow
- Combine flowers with vegetables for a lush, mixed garden
- Add aromatic herbs or trailing vines for a soft, cascading look
Even if your space is tiny, you can still create a show-stopping vertical garden with just a bit of creativity.
Troubleshooting Common Issues
Vertical gardens are fairly low maintenance, but here are a few problems you might encounter—and how to fix them.
Problem: Top plants are drying out
Solution: Water more frequently or install a drip system
Problem: Uneven growth
Solution: Rotate plants regularly and ensure even light exposure
Problem: Mold or rot in lower sections
Solution: Improve drainage and avoid overwatering
Problem: Plants outgrowing their space
Solution: Prune regularly and replant faster-growing species
Problem: Weak wall support
Solution: Reinforce mounting brackets or switch to a freestanding structure
Addressing these early prevents long-term damage and keeps your garden productive.
Final Thoughts: Growing Up With Style and Sustainability
Vertical gardening is more than a trend—it’s a solution. It’s a creative, eco-friendly way to grow your own food, decorate your space, and bring nature closer to your daily life. Whether you’re dealing with limited square footage or simply love the idea of a living wall, vertical gardening gives you the power to maximize every inch.
Start small with herbs or leafy greens, build confidence, and expand from there. Soon enough, you’ll have a garden that climbs, cascades, and overflows with life—one that reflects both your environment and your unique personality.
So go ahead, grow up.